How to Build a SmartWatch?
A programmable and 3D-printed digital watch.
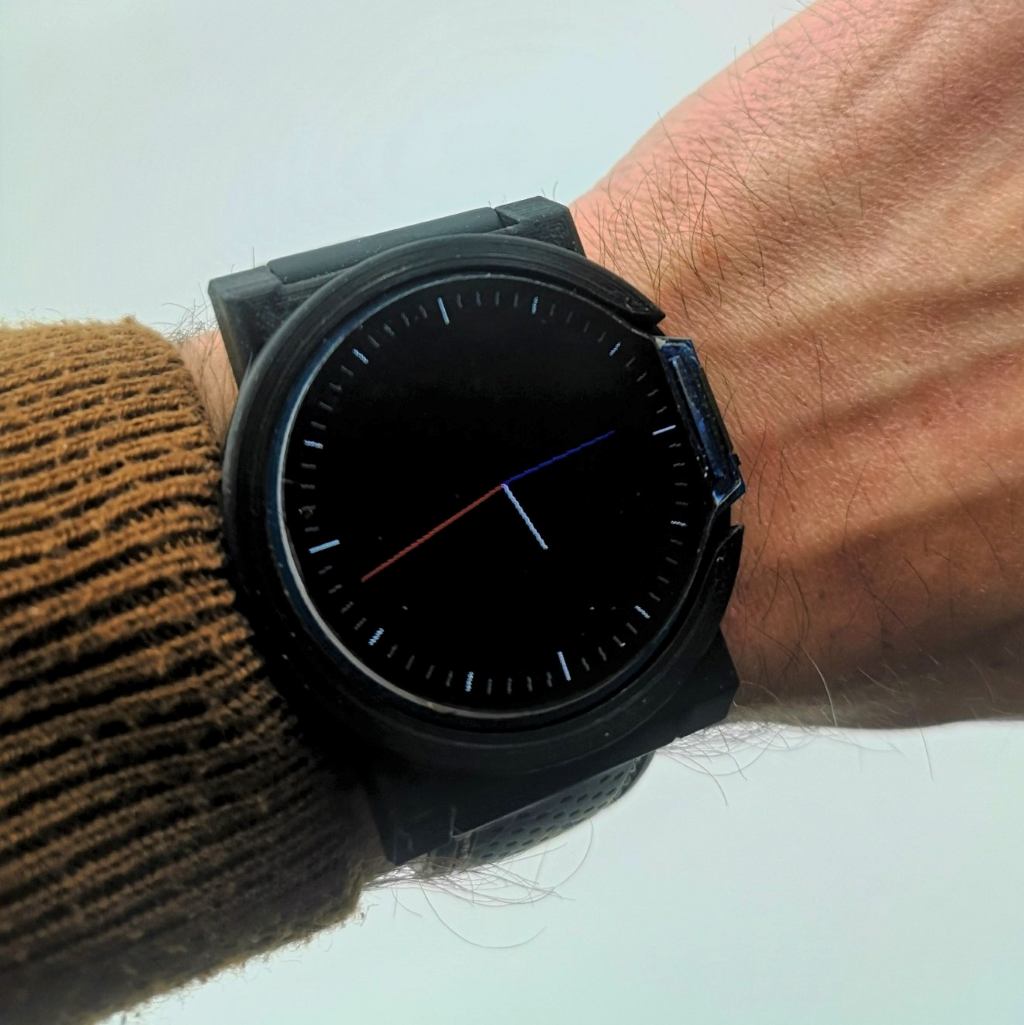
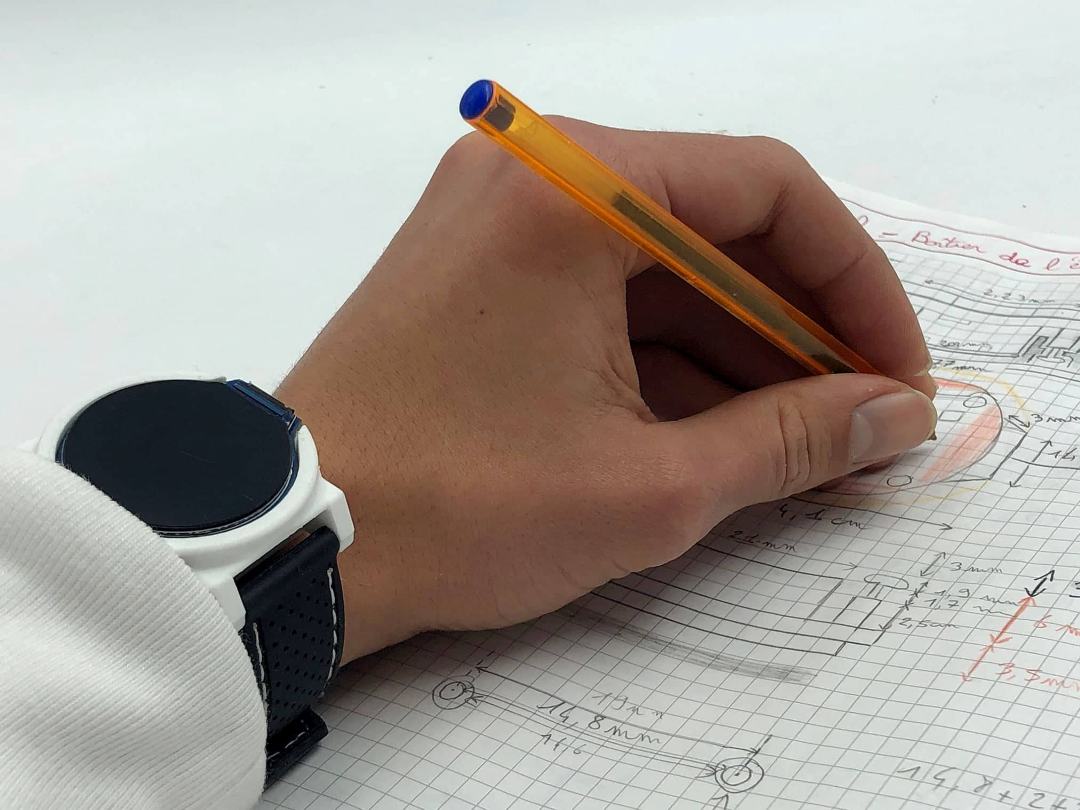
Wearable technologies are becoming ever more present in daily life. This tutorial shows how to build a smartwatch: it combines electronics (to program a liquid crystal display) and 3D printing (to make the watch case). It is a hands-on introduction to designing wearable technologies.
Context
The first liquid crystal display (LCD) was built in 1967 by Lechner et al.[1], a technology that enables low-power flat-panel displays[2]. The first LCD-screen watch followed in 1968[3], and Gordon Moore, co-founder of Intel, contributed greatly to advancing the technology[4]. LCDs are now found in most screens, including smartwatch displays.
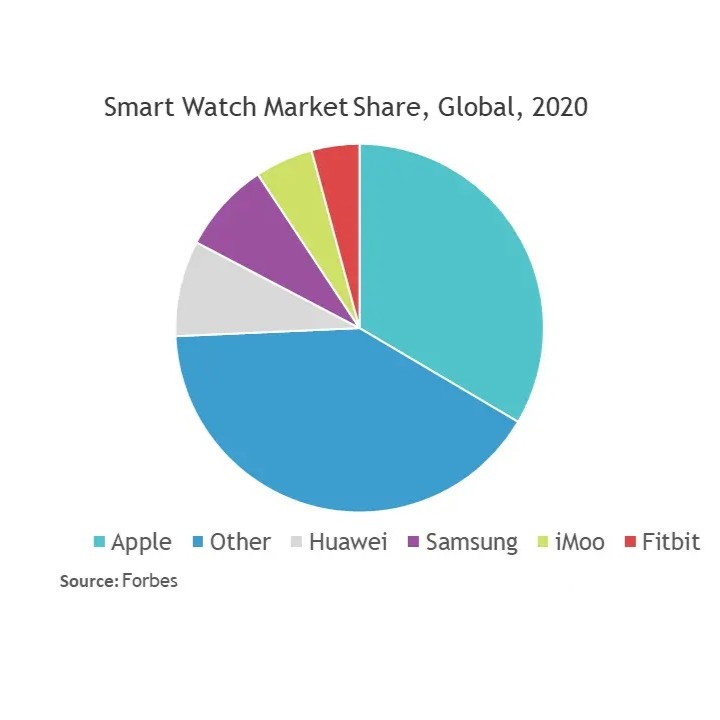
The Pulsar NL C01, designed in 1982, is considered the first smartwatch — a user-programmable watch[5]. Their features have multiplied since, covering connectivity, sports, and health[6], and their strong personalization has boosted their popularity[7]. Smart-wearable shipments reached 270 million units in 2020 and are projected to hit 770 million by 2026[8].
Technological tools are increasingly within reach of individuals. Prototyping platforms make electronics easy to program, and 3D printing allows tailor-made objects, so non-professionals can now build complex devices such as a smartwatch.
Skills & Opportunities
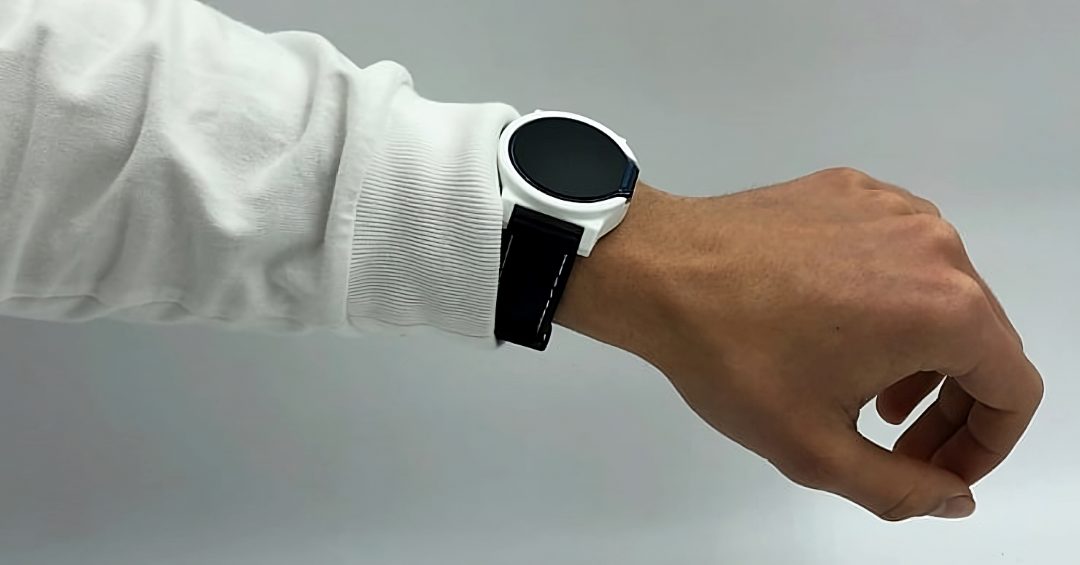
The first skill is programming LCD screens, which lets you print images, videos, GIFs, and data. The second is slicing 3D models, the step that precedes any 3D print and lets you produce any object, such as a watch case. Building this smartwatch is a first approach to wearable technologies.
Requirements
This project involves several prerequisites:
- A 3D printer and its slicing software,
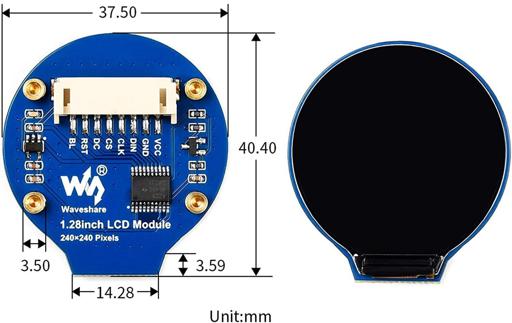
- A 1.28" round LCD display module from WaveShare (orderable here),
- An electronic board compatible with the LCD screen,
- A wristband from an old watch,
- 8 electronic wires,
- A USB key,
- 4 small screws of 2 mm diameter (optional).
Tutorial
This project has three steps: 1. LCD programming, 2. Case 3D printing, and 3. Smartwatch assembly.
1. LCD programming
The WaveShare 1.28" round LCD module embeds a GC9A01 driver and supports Raspberry Pi, Arduino, and STM32 boards. It uses the Serial Peripheral Interface (SPI) — a synchronous serial bus for short-distance communication, mostly in embedded systems. The GC9A01 datasheet is available here.
1.1. Hardware connection
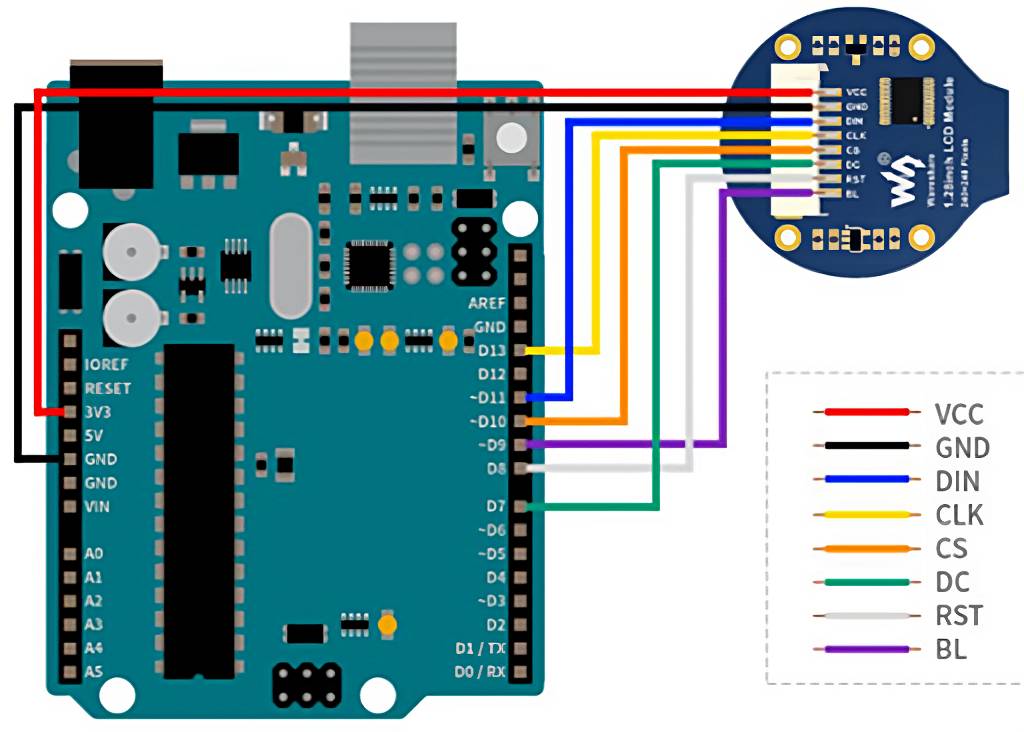
Wire the LCD according to your board:
| LCD pin | Description | Arduino UNO | STM32 | RPi (BCM2835) | RPi (Board) |
|---|---|---|---|---|---|
| VCC | 3.3V/5V power input | 5V/3.3V | 3.3V/5V | 3.3V | 3.3V |
| GND | Ground | GND | GND | GND | GND |
| DIN | SPI data input | D11 | PA7 | MOSI | 19 |
| CLK | SPI clock input | D13 | PA5 | SCLK | 23 |
| CS | Chip selection, low active | D10 | PB6 | CE0 | 24 |
| DC | Data/Command control | D7 | PA8 | 25 | 22 |
| RST | Reset | D8 | PA9 | 27 | 13 |
| BL | Backlight | D9 | PC7 | 18 | 12 |
1.2. Software configuration
Install the GFX library. For Arduino, download the ZIP from GitHub (green "Code" button → "Download ZIP"). In the Arduino IDE, go to Sketch → Include Library → Add .ZIP Library… and select the downloaded ZIP.
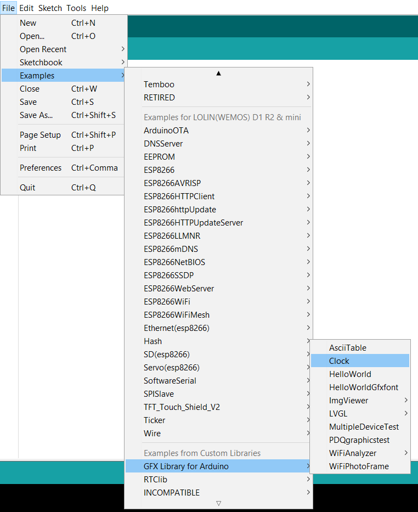
Load the clock example. In the IDE: File → Examples → GFX Library for Arduino → Clock.
Show line numbers. File → Preferences → enable "Display line numbers".
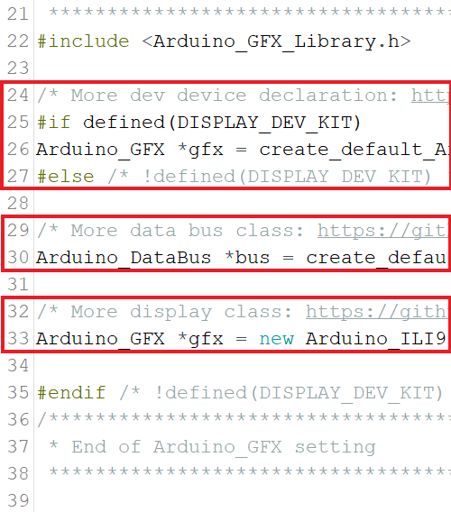
Set the data bus class. Paste it below line 30, and comment out line 30 by prefixing it with /*.
Arduino_DataBus *bus = new Arduino_SWSPI(7 /* DC */, 10 /* CS */, 13 /* SCK */, 11 /* MOSI */, -1 /* MISO */);
Set the display class. Paste it below line 33, and comment out line 33.
Arduino_GFX *gfx = new Arduino_GC9A01(bus, 7 /* RST */, 0 /* rotation */, true /* IPS */);
Upload the code.
2. Case 3D printing
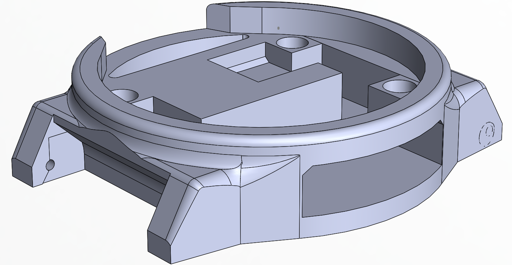
Download the STL file here.
Upload the STL into your 3D slicer software.
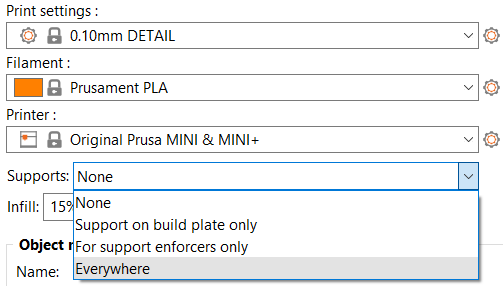
Set the layer height to 0.10 mm or below.
Set the filament and printer. Here, PLA plastic and an Original Prusa MINI.
Choose supports everywhere.
Slice the piece: one slice per layer.
Generate the G-code.
Save the G-code on a flash drive (some printers read USB keys, others SD cards), plug it into the printer, and print the case.
Carefully remove the supports from the printed piece.
3. Smartwatch assembly
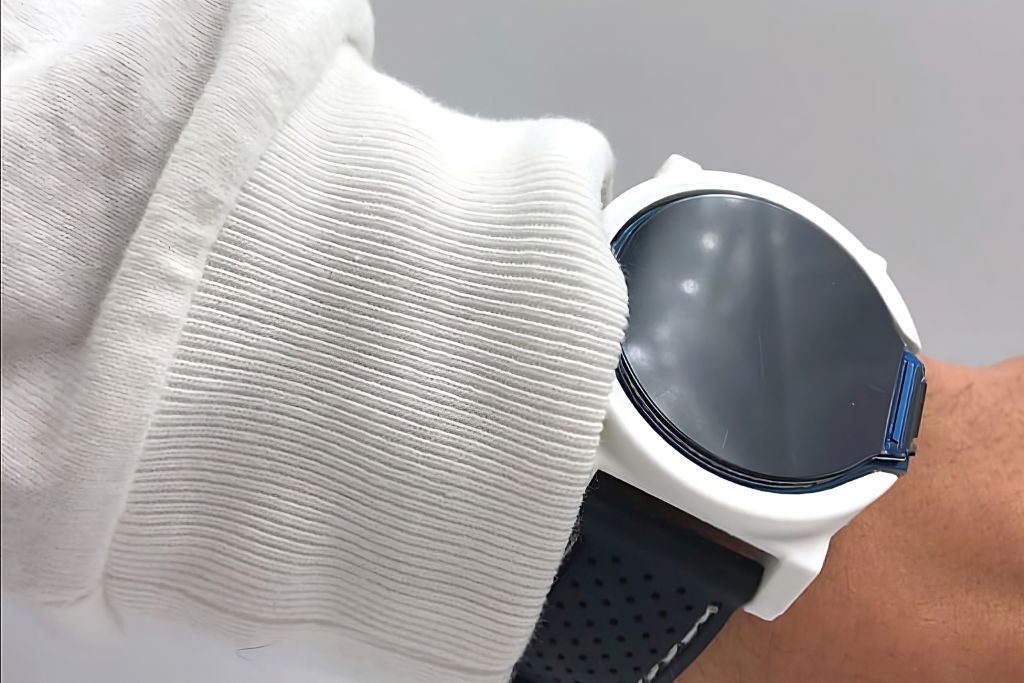
- Insert the LCD screen into the enclosure.
- Plug the electronic cables into the LCD screen (push the connector with a screwdriver if needed).
- Optionally, fix the case and screen together with four 2 mm screws.
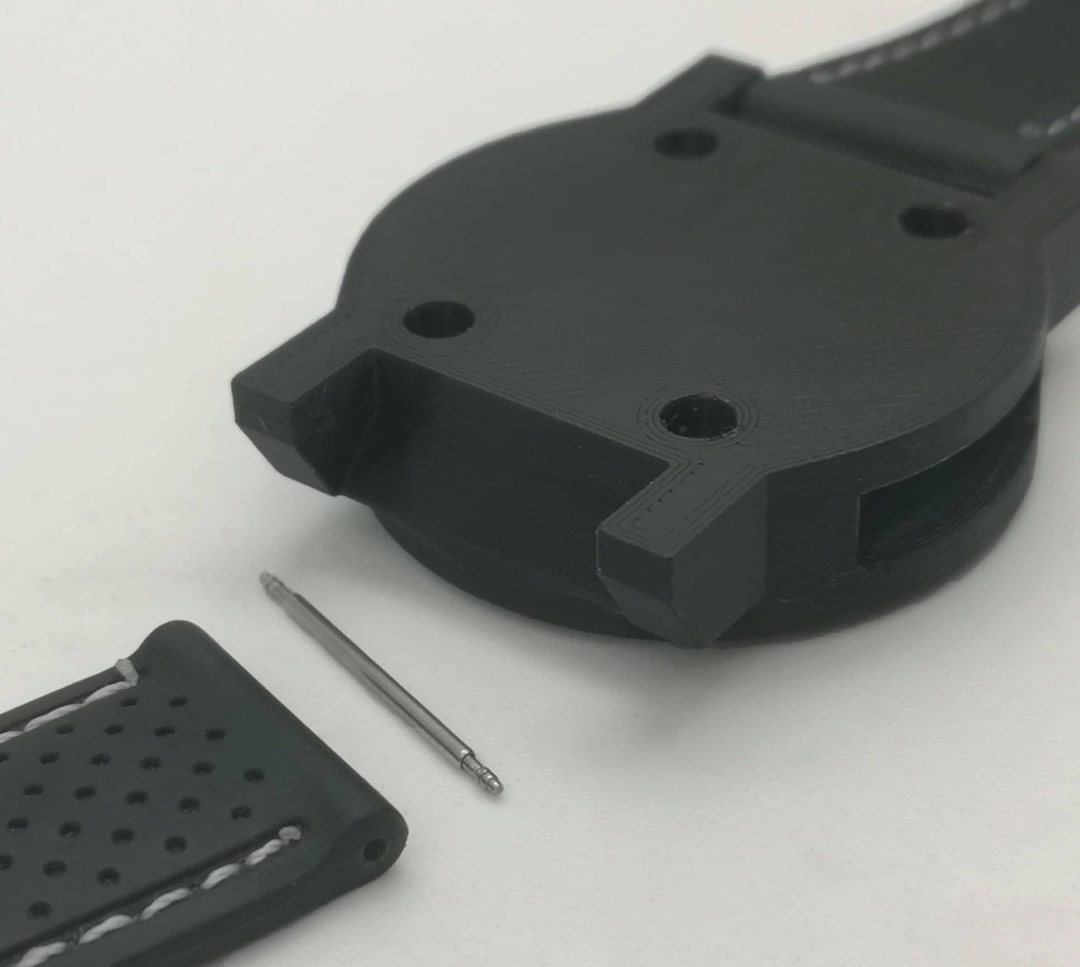
- Recover the wristband and the two small iron rods from an old watch (a thin blade helps fold the rod ends).
- Insert a rod into the case holes provided for it.
Reproducibility
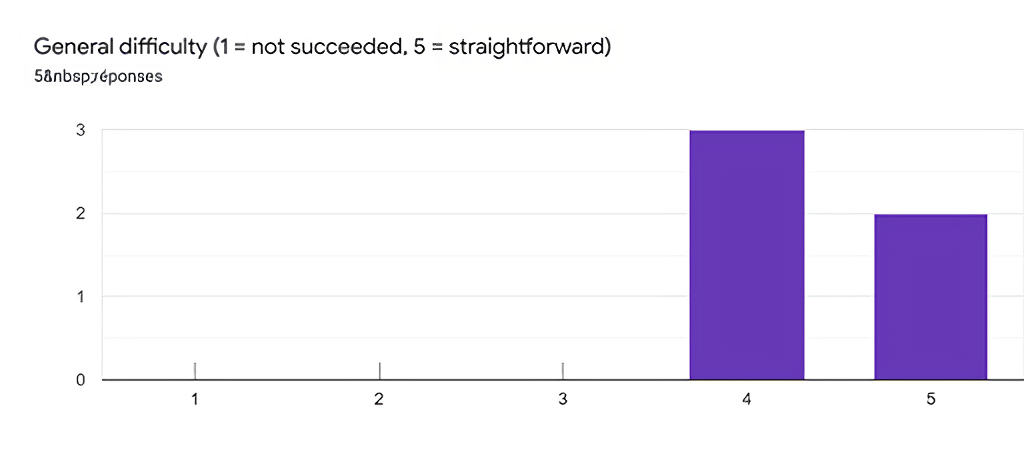
An evaluation tested the tutorial's reproducibility. A group of 5 people followed it, all using an Arduino Uno with the Arduino IDE to program the driver and a Prusa Mini with PrusaSlicer to print the case. Four were familiar with electronics, three with 3D printing.
All five completed the tutorial. Rating each step's difficulty, they found the LCD programming part involved minor difficulties on average, while case printing and assembly were straightforward.
Participants unanimously found the content educational, and all felt their electronics or 3D-slicing skills had improved — one even wanted to try another DIY wearable tutorial.
Conclusion
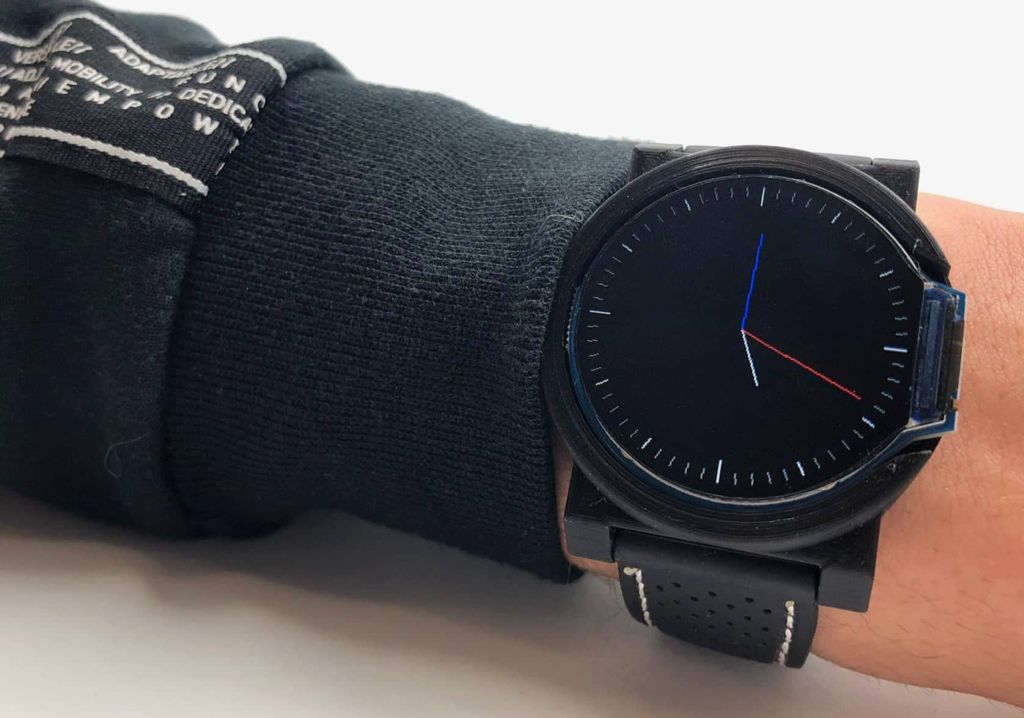
This tutorial builds a first smartwatch from scratch as simply as possible, making smartwatch design widely accessible, a first wearable-technology experience for beginners and seasoned makers alike. It has limits, though: the watch does not keep time, and the device is not truly wearable. The Open Smartwatch Project overcomes these with hardware modules (including the GC9A01), 3D-printable cases, and a custom operating system — though it requires solid electronics and programming knowledge.
References
- Lechner B., Marlowe F., Nester E. & Tults J. Liquid crystal matrix displays. IEEE International Solid-State Circuits Conference, 1969, pp. 52–53. doi:10.1109/ISSCC.1969.1154684
- Cristaldi D., Pennisi S., Pulvirenti F. Liquid Crystal Display Drivers: Techniques and Circuits. 2009.
- Castellano J. The History of LCD Development. 2005.
- Sethi A.K. "Chips" and Displays. In: The Business of Electronics, Palgrave Macmillan, 2013. doi:10.1057/9781137323385_9
- Dehghani M. Exploring the motivational factors on continuous usage intention of smartwatches among actual users. Behaviour & Information Technology, 2018, 145–158. doi:10.1080/0144929X.2018.1424246
- Romanski B., et al. Technology Roadmap: Smartwatches. In: Roadmapping Future: Technologies, Products and Services, 2021, pp. 209–223. doi:10.1007/978-3-030-50502-8
- Chen X., et al. A comparative study of smartphone and smartwatch apps. Proceedings of the 36th Annual ACM Symposium on Applied Computing, 2021, 1484–1493. doi:10.1145/3412841.3442023
- Mordor Intelligence. Smart Wearable Market — Growth, Trends, Covid-19 Impact, and Forecasts (2022–2027). 2021.